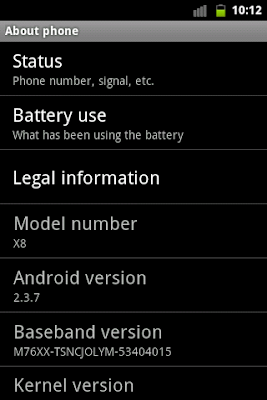
For Sony Ericsson Xperia 8 users who want to update Eclair to Gingerbread kernel system I have a way to be able to run the kernel on Gingerbread follow the step that is not there missed, especially been on assembly rom:
Tools required:
NEED: <download>
SuperOneClick :
SuperOneClickv1.7.1-ShortFuse
xRecovery :-
xRecovery0.1.rar
Root Explorer :-
Root.Explorer.v2.16
HOW IT IS DONE:
Step 1: Root your Xperia X8
- download and unzip SuperOneClickv1.7.1-ShortFuse to PC Desktop
- connect Xperia X8 to PC (Do not mount)
- on your phone <goto><setting><applications> select <unknown sources>
- on your phone <goto><settings><applications><development> select <usb debugging>
- Launch SuperOneClick -> click <Root>
- you will see - <not successful - is your phone software higher than 2.0?>
- click <yes> and then <success> & <test su> message
- Reboot Xperia X8
If you are successful in ROOTING your phone - SuperUser app will be installed to your Xperia X8.
If you are not successful:-
(a) check your PC <devices><usb> to see if your phone is recognized by your PC (troubleshoot PC driver problem)
(b) <usb debugging> in your Xperia X8 phone settings enabled?
Then <Launch> <SuperOneClick> and try again.
[if you don't have a file manager on your phone]
Install <Astro File Manager> from Android Market
Step 2: Mount Xperia X8 (to access SD Card)
- copy <Root.Explorer.v2.16.apk> to root of SD Card
- using PC create folder <xRecovery> and unzip xRecovery0.1.rar
- put the 3 files into the xRecovery folder you've created
- copy the xRecovery folder to root of SD Card
Step 3: UnMount Xperia X8 from PC
Step 4: Launch <Astro> Install <Root Explorer v2.16.apk>
Step 5: Copy xRecovery files to </system/bin> of your phone
- Launch <Root Explorer>
- scroll down to /sdcard <click to access>
- scroll down to xRecovery folder <click to access>
- Select each of the 3 files (one by one) <click & hold><copy>
- <click> parent folder (twice)
- scroll down to <click to access><system>
- <click to access><bin> and <click><Mount R/W>
- press <paste> button
COPY ALL THE 3 FILES (one by one) FROM xRecovery Folder to </system/bin> folder
(i.e. busybox, chargemon and xrecovery.tar)
Once you have done that... you have installed xRecovery to your Xperia X8
SHUTDOWN -> Wait 5 seconds and REBOOT
When you see the words [Sony Ericsson] on the phone screen - start pressing the back button on your phone multiple times and you will enter the xRecovery Menu.
USING xRecovery
Select Buttons = Volume Up & Volume Down Buttons
Enter Button = Home Button
Back Button = Back Button
To BACKUP your Xpedia X8's current ROM
select <backup and restore><backup> from the menu
This will create a backup file in your SD Card <SD/xRecovery/backup>
Note: Typically the backup should be around 256MB in size, so you may want to copy the file to your PC to lighten your 2GB SD Card.
To RESTORE from a backup of your current ROM
select <backup and restore><restore> from menu & select the <file_name>
Note: If you have a backup on PC just copy it to <SD/xRecovery/backup> and restore as usual.
To install a Custom ROM (e.g. GINGERBREAD 2.3.3 CM7 for Xpedia X8)
Just download it from the xda-developers.com website and copy to SD Card
reboot and use xRecovery to <restore> the Custom ROM to your Xperia X8.
And join grub @Facebook


0 comments:
Post a Comment